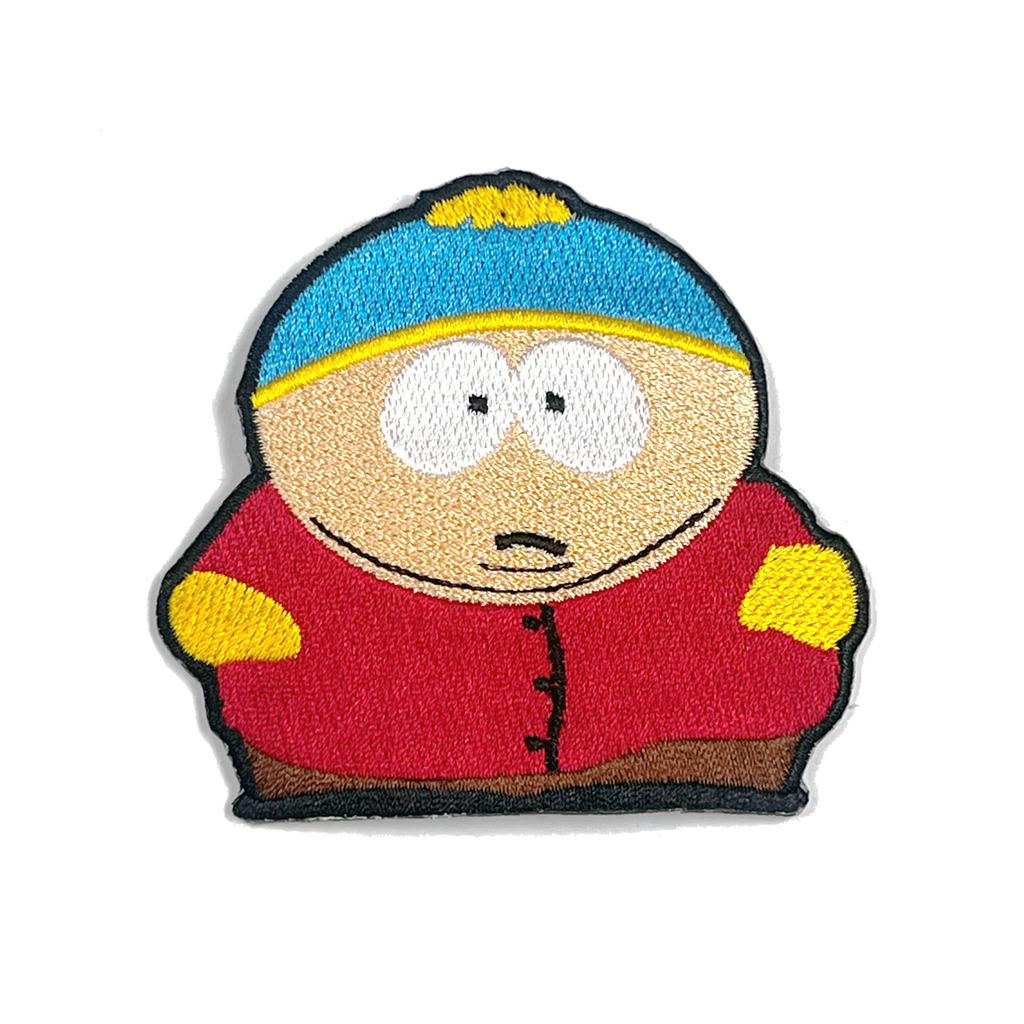
Trend Alert: Embroidered Patches as Must-Have Elements in Streetwear and Indie Fashion
Embroidered patches are resurfacing as a flexible, cost-efficient way for independent apparel brands to personalize garments, signal identity, and test new ideas at speed. This post reviews why patches are trending today, how small labels can use them to stand out, and practical steps to design, produce, and market patch-led collections without heavy upfront risk.
Why are embroidered patches trending and why should indie brands care?
Custom Embroidered patches have regained momentum because they offer an inexpensive, flexible method to customize garments and convey identity quickly. Nostalgia, a DIY mindset, and faster production workflows enable small brands to run low-volume, high-impact drops that feel deliberate and crafted.
Nostalgia and visible craftsmanship drive the appeal. Patches evoke vintage uniforms, varsity aesthetics, and punk DIY vibes that align with streetwear and indie tastes for retro references and tactile detail.
The DIY and maker culture, amplified by social platforms, sets an expectation for pieces that feel unique rather than mass-produced. Patches allow rapid co-creation with limited runs and easy collaboration opportunities, which small brands often pursue.
Practical advantages for indie labels include:
- Low barrier to entry: Many suppliers offer no minimum quantities, making it feasible to test motifs or run capsule drops without large upfront inventory.
- Cost efficiency: Basic patches can be very affordable, allowing distinctive branding or artwork without a large per-unit cost increase.
- Fast iteration: Digital design proofs can come quickly, with some providers delivering a digital proof within hours and production turnarounds in days.
- Versatility in application: Backings such as iron-on, sew-on, Velcro, and adhesive, plus finish options like metallic or reflective threads and special borders, let patches suit different fabrics and uses.
- Durable, high-contrast detail: Embroidery offers tactile texture and colorfast materials that endure washing and rough wear common in streetwear.
Key data points to consider:
- No-minimum quantity options are widely available, enabling single-piece orders and small tests.
- Basic embroidered patches can start around 0.25 per piece, with higher-detail finishes costing more.
- Design services and fast proofs are common, with some providers offering proofs within a half-day and production turnarounds measured in days.
- Durability and colorfast finishes help patches hold up under repeated washing, a good fit for streetwear materials.
In short, patches offer affordable branding, quick experimentation, and tactile design that matches current consumer demand for distinct, limited, and customizable apparel.
How are today’s streetwear and indie brands using Custom embroidered patches to stand out?
Patches are being used as collectible, tactile signals on key products and capsule drops. The strategy centers on limited runs, visible placement, and special finishes to create scarcity and sensory value. Examples of practice include seasonal patch drops, oversized or asymmetrical patches on high‑impact pieces, and modular hat systems that let brands mix and match identity pieces.
How this looks in practice
- A streetwear label releases seasonal patch designs to drive social sharing and resale interest through limited-edition drops.
- High-fashion and streetwear hybrids use oversized or off-kilter patches to elevate patches from mere branding to couture-like detailing.
- Hat and headwear brands emphasize modular patch systems, allowing a single patch design to span multiple colors and styles.
- Independent UK labels and small-batch streetwear leverage low minimums and various backing options to iterate quickly and create collectible pieces for local communities.
- Varsity and nostalgia‑driven pieces use chenille or merrowed-edge patches to achieve a classic, tactile look on jackets and fleece goods.
Why these approaches work
- Scarcity and collectibility create social buzz and signaling among followers.
- Heavy embroidery, chenille, metallic threads, and 3D puff add perceived value and luxury appeal.
- Modular production and inventory flexibility let brands keep a master design while refreshing colorways and silhouettes with low risk.
Practical tactics that differentiate successful brands
- Backings chosen to fit use case: swapable Velcro or sew-on for modular, iron-on for quick retail customization, or specialized backings for permanent placement.
- Finish and edge strategies: merrowed borders for a vintage weight, laser-cut edges for complex shapes to reduce edge lift on curved fabrics.
- Story-driven context: patches become narrative objects—commemorative event badges, collaboration marks, or locally themed motifs—so items carry meaning beyond a logo.
Takeaway for indie and streetwear brands
- Use limited-edition patch drops to create demand and social sharing.
- Match patch construction to the garment’s lifecycle and use case.
- Design for bold, high-contrast stitches and test with physical samples before scaling.
What are the most popular design themes and trends for embroidered patches right now?
The hottest patch themes today include distressed vintage finishes, elevated texture (3D/puff and chenille-like effects), fine-detail woven artwork for small typography, celestial and botanical motifs, and slogan or statement patches tied to activism and identity. These trends balance tactile detail with high-fidelity imagery depending on the brand’s intent.
Why these themes resonate
- Distressed and vintage textures provide a lived-in, artisanal look and read as authentic. The distressed embroidery segment is growing, with a projected CAGR around 7.2% through 2028 supported by streetwear demand for personalized pieces.
- Fine-detail woven patches preserve complex logos and thin text where traditional embroidery can blur, making them useful for photographic or intricate artwork.
- Nature-inspired motifs like celestial bodies and flora fit mood-driven aesthetics and support collectibility in jacket, bag, and accessory lines.
- Slogan and activism patches offer wearable declarations, signaling beliefs or affiliations with clear legibility and impact at patch scale.
Design themes and execution at a glance
- Distressed / vintage
- What: sun-faded looks, raw edges, deliberate fraying or stonewash effects.
- Why it works: communicates heritage and handcrafted value.
- Design notes: use mid-weight fabrics and plan higher stitch counts; pre-production samples help lock the effect.
- Elevated texture (3D puff, chenille)
- What: foam-backed 3D embroidery and plush textures for bold logos.
- Why it works: adds visual pop and perceived premium quality.
- Design notes: limit fine detail on 3D elements; best for bold shapes and icons.
- Fine-detail woven and hybrid patches
- What: woven patches or printed surfaces for photo-like detail and tiny text.
- Why it works: preserves fine lines and small typography.
- Design notes: choose woven for micro-details; consider woven cores with embroidered borders for contrast.
- Celestial and botanical motifs
- What: moons, stars, moths, flowers, and nature-driven icons.
- Why it works: aligns with lifestyle aesthetics and collectibility.
- Design notes: use motif libraries and ensure scalable readability across garments.
- Slogan, activism and typography
- What: short phrases, cause logos, community markers.
- Why it works: wearable declarations invite conversation and signaling.
- Design notes: prioritize legibility with high contrast and simplified letterforms.
- Alternative materials and finishes
- What: PVC, silicone, sequins, reflective or metallic threads for durability or sparkle.
- Why it works: outdoor gear, night visibility, or premium accents require different performance; match material to use case.
- Design notes: test compatibility with wash and wear and fabric type.
Practical design guidelines
- For micro detail or tiny text choose woven; for texture and depth choose 3D embroidery.
- Use simple color palettes and high-contrast thread choices for legibility at small sizes.
- Prototype distressed effects and 3D elements with physical samples to capture texture and patina accurately.
Sources for these trends include industry guides and design libraries that highlight typical motif categories and execution notes.
How can independent apparel brands use patches to better connect with and attract younger audiences?
Independent brands should treat custom embroidered patches as interactive storytelling tools that invite Gen Z and millennial customers to co-create identity, express values, and extend garment life. Patches work best when brands pair tangible customization with social and community experiences that let young customers personalize and publicly display what matters to them.
Why patches resonate with younger buyers
- Patches enable visible personal expression and repair culture. Younger shoppers value sustainability and extending garment life, and patch-based mending events are gaining popularity as a way to resist disposable fashion.
- Patches convert small design elements into narrative hooks, referencing local events, social causes, playlists, or micro-communities to spark conversations and identity signaling.
Practical tactics for reaching Gen Z and millennials
- Co-creation and customization experiences: offer in-store or online patch customization with easy backings and simple swaps so garments evolve with the owner over time. Invite fans to submit patch artwork or vote on limited runs to boost ownership and social sharing.
- Repair and upcycling as story: host mending nights and patch-oriented pop-ups to teach repair skills and position patches as both aesthetic and functional, supporting longevity themes.
- Inclusive design and narrative: develop motifs that reflect diverse identities, pronouns, and cultural references with legible typography and accessible placement across silhouettes.
- Modular, social-first formats: offer starter patch packs that encourage collecting and swapping; create brand hashtags and resharing programs to amplify community content.
- Collaborations with creatives and micro-influencers: work with local artists to release capsule patch series that bring cultural credibility and reach niche communities.
- Low-friction digital tools: provide mockups, short application guides, and AR previews so young customers visualize patches on different garments.
Design and production considerations for youth audiences
- Keep customization fast and affordable; small-batch patches and smooth checkout help younger buyers experiment.
- Match backing to intent: removable backings for trend-driven looks and permanent backings for repair-focus pieces.
- Balance specificity and versatility: tell a story with motifs that fit everyday wear without locking customers into a single look.
Measuring success with younger audiences
- Engagement metrics: user-generated content, event attendance, and hashtag use indicate resonance.
- Repeat purchases and swaps: higher repeat patch pack purchases or repair service usage signal deeper loyalty.
- Community growth: growth of local chapters or artist collaborations shows culture-building impact.
Quick action steps for brands today
- Launch a starter patch pack with removable backing and an online customize option.
- Host a mending night or patch swap quarterly and capture content for social channels.
- Partner with a local artist for a limited capsule and amplify via micro-influencers.
- Offer simple repair kits and how-to content to connect patches with sustainability messaging.
Notes on design and production for youth audiences
- Keep customization fast and affordable; ensure the checkout path and revisions are smooth.
- Provide backing options that match the intended lifecycle and ease of use.
- Craft motifs that tell a story but can be integrated with everyday basics for flexible styling.
How to measure success quickly
- Track engagement through UGC volume and event participation.
- Monitor repeat purchases of patch packs and participation in repair services.
- Observe community growth through local events and artist collaborations.
What are the best ways for indie brands to design and implement custom patches?
Start with a clear use case and prototype early. Work with a manufacturer that offers realistic digital proofs and physical samples, then integrate patches into your product system using modular SKUs, measured drops, and low-friction application options.
1) Concept and brief: design with purpose
Define the primary reason for the patch—branding, repair or upcycling, collectible drops, collaborations, or functionality. A focused brief keeps artwork and material choices aligned with the customer experience. Limit scope for small runs by prioritizing one or two core elements that read well at patch scale. Create a tiered design plan with a main motif for repeat use and smaller variants for seasonal drops to speed iteration.
2) Choose materials by use case and placement
Match patch type to needs: embroidered for texture and bold shapes, woven for thin lines and micro-detail, PVC for weather resistance, chenille or leather for retro or premium feels. For backings, select sew-on for permanence, Velcro for modularity, or iron-on for fast retail application. Choose backing to match how the garment will be treated over time.
3) Prototype and validate before committing
Always obtain a physical stitch-out or sample and test on the actual substrate with a wash and wear test to confirm adhesion, shrinkage, and edge behavior. Use sizing methods to plan patch size for placement on each product.
4) Vet manufacturers and set clear production terms
Ask about digitizing services, mockups, sample lead times, MOQs, price breaks, and typical production turnaround. Request stitch-out photos and color-matched thread swatches for quality control. Insist on a short test run with clear acceptance criteria before scaling.
5) Production and delivery logistics
Stagger production in micro-batches to reduce risk and incorporate feedback before larger runs. Plan lead times and consolidate inventory by applying patches to multiple blank garments when possible.
6) Integrating patches into product and marketing strategy
Use modular SKUs for patches as accessories or applied options. Build limited drops into a calendar and align with seasonal themes or collaborations. Provide simple application guides and on-site services at events to deliver a finished product immediately. Track patch-specific KPIs such as attach rate, patch-only sales, user-generated content, and replacement patch sales.
7) Pricing and margins
Treat patches as a margin lever. Calculate all-in cost per patch (unit cost plus shipping plus digitizing amortized and labor) and decide whether to absorb for promotions or price as an accessory. Start with conservative pricing to cover sampling and digitizing costs, then test bundles or applied options.
8) Small-brand operational tips
Standardize brand assets (master color files, embroidery-friendly logos) and maintain a simple library of approved patch sizes and backings to speed up future orders. Document care instructions to reduce returns related to washing or adhesion issues.
Supplier guidance and practical checks
- Ensure you get digitizing and free digital proofs, and confirm turnaround times for proofs and samples.
- Request physical stitch-outs and thread swatches for color and texture accuracy.
- Clarify MOQs, price breaks, and whether micro-batches are supported.
- Ask for wash/adhesion testing photos and a QC checklist before full production.
- Discuss recommended border and cutting methods (merrow vs laser-cut) for your fabrics.
Practical takeaways
- Choose patch type by design need: woven for micro-detail, embroidered for texture, chenille for retro feel, or PVC for durability.
- Decide backing by lifecycle: sew-on for permanence, Velcro for modularity, iron-on for quick retail use.
- Obtain digitizing and physical stitch-outs plus wash tests before scaling.
- Start with a small test run and iterate in micro-batches.
- Use stitch-out photos and thread swatches as quality gates.
Immediate next actions you can take today
- Draft a one-page brief with use case, backing preference, and three colorways.
- Email 2 vetted suppliers requesting free digital proofs and stitch-out quotes with sample lead times.
- Create a simple landing page or product card for patches with application instructions and patch SKU details.
- Identify one micro-influencer and offer a starter pack in exchange for posts and rights to images.
- Schedule a patch-focused event such as a mending night or patch application day within the next 30 days.
Can incorporating custom patches really set independent brands apart from mass-market labels?
Yes. Custom patches provide a fast, low-cost path to distinct, collectible products and layered brand storytelling that mass-market labels struggle to replicate at comparable speed or with the same emotional resonance. By combining low-volume production, tactile detailing, and story-driven drops, patches can amplify uniqueness, deepen loyalty, and create measurable marketing moments.
Why patches differentiate brands
- Low-cost experimentation that preserves margin: patches can start around 0.25 per piece, enabling design tests or accessory packs with limited risk. Even with premium finishes, small runs remain affordable for indie labels in many scenarios.
- Agility in product cycles: suppliers commonly offer fast proofs and short production windows, enabling rapid response to cultural moments or collaboration opportunities.
- Perceived value through tactile detail: heavier embroidery and raised textures are widely associated with quality and premium positioning, supporting higher price points and stronger brand perception.
What this means for loyalty, uniqueness, and marketing
- Patches become collectible signals that encourage repeat visits and patch-focused purchases. Measuring patch-specific KPIs helps understand retention driven by these collectibles.
- Modular design and patch-as-product reduce finished-goods SKUs while multiplying perceived assortment through multiple backings and placements.
- Stories and events around patches provide low-cost, authentic marketing moments that mass-market brands find hard to imitate quickly.
Operational and sourcing levers to reinforce differentiation
- No-minimum and sample-first workflows allow validation before committing to larger runs.
- Material and finish options (chenille, 3D foam, metallic threads, woven cores) let brands dial between heritage, street, and precision aesthetics.
- Distressed finishes are a growing option, with demand supported by market notes indicating continued growth in this area.
Risks and how to mitigate them
- Quality and legibility risk at small scales: prototype stitch-outs and work with digitizing-focused suppliers to preserve detail.
- Overuse diluting scarcity: reserve truly limited patches for drops and keep evergreen designs for ongoing cues.
Bottom line
When executed with a clear brief, rapid sampling, and story-led release plans, custom patches offer a practical, measurable lever for indie brands to differentiate, build loyalty, and create marketing moments that mass-market labels struggle to replicate quickly.
Best practice starts with matching patch construction and materials to function and placement, then prototyping physically and enforcing strong supplier quality control. Use the right patch type and backing for the intended use to avoid edge lift, legibility loss, or short life.
Material and technique mapping
- Embroidered (classic): textured and durable; best for bold logos and raised details. Avoid micro-text that can stitch into unreadable forms.
- Woven: ideal for thin lines, small text, and photographic detail where clarity matters.
- Chenille: plush, retro feel suitable for varsity looks.
- 3D/foam puff: dimensional logos with strong presence on caps and outerwear; limit fine detail.
- PVC/silicone: weather-resistant, durable for outdoor or tactical use; suited for non-fabric surfaces or rugged garments.
- Borders and cutting: merrowed borders provide vintage weight; laser-cut or heat-cut edges suit complex outlines on lighter fabrics.
Backing options by use case
- Sew-on: permanent and durable; ideal for heavily washed garments.
- Iron-on: quick retail application but may perform less on stretchy or delicate fabrics.
- Velcro: modular and swappable; good for hat patches or outerwear with changing sets.
- Peel-and-stick adhesives: easy for quick, single-use retail applications but rarely long-term.
Quality-control and production best practices
- Request digitizing and a free digital mockup early, followed by a physical stitch-out as a gate for production.
- Test patches on the actual garment and run wash, tumble, and abrasion tests to verify adhesion and edge behavior.
- Order a short test run and stagger production to refine digitizing settings and thread choices before large-scale runs.
- Use stitch-out photos and thread swatches as acceptance criteria and require a documented QC checklist from suppliers.
Common pitfalls and how to avoid them
- Overly complex artwork for embroidery: simplify logos and increase line weight; consider weaving for micro detail.
- Wrong backing choice for fabric type: test adhesion on stretch or delicate materials before committing to a full run.
- Skimping on physical samples: rely on physical stitch-outs in addition to digital proofs to confirm texture and patina before scaling.
Special finishes and when to use them
- Metallic and reflective threads: add premium accents and night visibility; test wash durability carefully.
- Distressed finishes: require higher stitch counts and experienced suppliers to reproduce consistent patina; prototype thoroughly.
Sustainability considerations
- Ask suppliers about low-impact threads (e.g., recycled materials), non-toxic adhesives, and reduced packaging. Request material specs and test results to verify sustainability claims.
Quick practical checklist
- Choose patch type by design need and fabric behavior.
- Pick backing by lifecycle and ease of use.
- Require digitizing, a free digital proof, thread swatches, and a physical stitch-out.
- Run a short test batch and verify with wash tests before scaling.
Supplier vetting questions to ask
- Do you provide digitizing and free proofs, and what is the turnaround time?
- Can you supply a physical stitch-out and thread swatches, and what is the lead time for samples?
- What are MOQs, price breaks, and typical production timelines? Do you support micro-batches?
- Can you perform wash/adhesion tests and provide acceptance photos or a QC checklist?
- What borders and cutting methods do you recommend for my fabric?
Immediate next actions
- Decide on patch type, backing, and size ranges for your first two SKUs.
- Request digitizing and a free digital mockup, plus a stitch-out sample from two suppliers.
- Test patches on the target garment and document the results with photos.
- Plan a micro-batch launch and align it with a simple promotion plan.
Promotional content ideas
- Show close-up texture shots and thread direction to communicate quality.
- Publish short how-to videos for applying iron-on patches and basic hand sewing.
- Share before-and-after repair shots to link patches to sustainability.
- Feature collector stories and limited-edition patches to increase perceived value.
Sources and useful references
- Material and backing mapping resources for patch types.
- Sampling and stitch-out guidance to validate texture and scale.
- Supplier workflows for proofs, MOQs, and production timelines.
How do I get started with embroidered patches for my brand right now?
Begin with a focused 30-day plan that includes a clear use case, rapid prototyping, and a small initial launch. The plan emphasizes design brief clarity, quick digitization, physical sampling, a micro-batch production, and a social promotion strategy to drive early feedback and learning.
30-day fast-start plan
- Days 1–3: Write a one-page brief defining the patch purpose (brand badge, repair pack, or collectible drop), target placement, and backing preference. Limit artwork to 1–2 core elements for clear patch readability.
- Days 4–6: Contact 2–3 vetted suppliers to request digital proofs and a stitch-out sample. Ensure proofs can be delivered quickly and confirm sample lead times.
- Days 7–12: Receive stitch-outs, mount on the intended fabric, and run a wash and wear test. Use results to finalize thread choices and backing.
- Days 13–20: Place a micro-batch order (roughly 25–100 pieces, depending on patch type and risk tolerance). Some suppliers accommodate small orders.
- Days 21–30: Prepare product pages with clear application instructions and texture close-ups. Plan a small launch event or pop-up and a simple social content plan to showcase texture and application.
Design and production quick checklist
- Finalize a single size range and placement per SKU.
- Specify patch type (embroidered for texture, woven for micro-detail, chenille for heritage, PVC for durability).
- Choose backing (sew-on, Velcro, or iron-on) based on lifecycle expectations.
- Request digitizing files, a free digital proof, thread swatches, and a physical stitch-out before production.
- Test patch adhesion and appearance on the actual garment and complete a wash test before full-scale production.
Launch and promotion playbook
- Starter packs and bundles: offer a 3-patch starter pack with removable backing to lower entry price and encourage collecting.
- Limited-edition timed drops: release a small batch with a visible cap on availability to create urgency.
- UGC-first social campaign: prompt buyers to post application shots with a brand hashtag and consider a small repost reward.
- Micro-influencer capsule: work with a few local creators to style patches across silhouettes.
- Mending nights and on-site application: host events to demonstrate patching and connect with sustainability messaging.
- Retail-friendly options: offer pre-applied garments and patch-only SKUs at events with on-site patching services.
Pricing and inventory tactics
- Calculate all-in patch cost (unit price plus shipping plus digitizing amortization plus labor) to determine pricing strategies.
- Use conservative pricing to cover sample costs and digitizing, then test bundles or applied options to reach higher price points.
- Document care instructions and ensure customers understand patch care to reduce returns.
Immediate next actions you can take today
- Draft a one-page brief for your first patch with a clear use case and three colorways.
- Reach out to two suppliers for free digital proofs and stitch-out quotes with lead times.
- Set up a simple product page or landing card for patches with application guides.
- Identify a micro-influencer to partner on a starter pack and content plan.
- Schedule a patch-focused event within 30 days and promote it locally.
Promotional content and creative prompts
- High‑quality close-ups that showcase texture and thread direction.
- Short how-to videos for patch application and basic sewing techniques.
- Before-and-after repair visuals linking patches to sustainability stories.
Next steps and references
- Review supplier options for proofs, MOQs, and production timelines.
- Prepare care and application guides for customers.